

How To Repair Wood On Pop Up Camper
Practise you have a popular up camper with water damage to the roof? The used camper we bought had taken then much water that the wood was rotting away and the roof needed to be repaired. Here's how to rebuild a pop upwards camper roof and make it watertight so it doesn't leak in the future.
This is the second mail service in a ii office series. Caput on over to the starting time post to come across where we started with our Starcraft popular up camper roof and how we took apart the roof before rebuilding.
Function one: Removing the Popular Upward Camper Roof and Assessing the Water Damage
- Remove the Exterior Trim to Assess Damage
- Detach the Canvas and Remove the Roof
- Remove Rotted and Water Damaged Wood
Role 2: Rebuilding/Repairing the Roof and Making it Water Tight (you lot are here)
- Rebuild Roof Structure with New Wood
- Reattach Roof and Sail to Camper
- Seal Upward Holes and Seams to Preclude Time to come Leaks
- Cosmetically Repair the Ceiling
Rebuild Roof Structure with New Woods
New Cloth Needed:
- 1″ x 2″ boards (we needed about 30′, but this number will vary)
- i″ x viii″ x 12′ pino board (cut in half and used for front and back roof sides)
- ane″ ten 12″ 10 10′ pino boards (2 – ane for each side of roof)
- white aluminum sheeting
- contact cement (or other permanent adhesive)
Adopt to watch? Here's a video description of how we rebuilt the roof. Or, scroll down to read the tutorial.
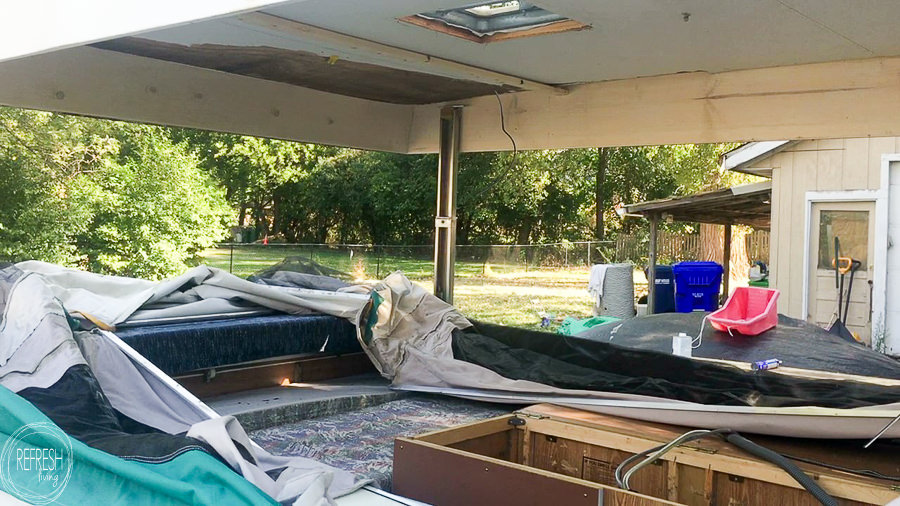
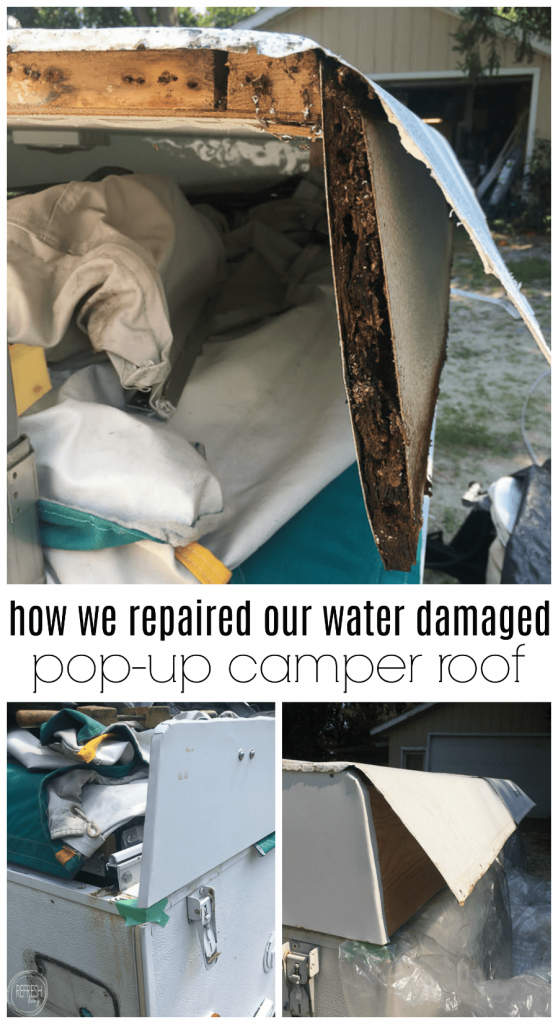
In Part i of how to remove the pop up camper roof, I showed y'all how rotted away the one x two ceiling frame was on our pop upwards camper. We decided to replace all of the perimeter of this frame, but thankfully, in one case we removed that wood, we found that the i x 2s that ran across the ceiling, and the square in the heart for the roof vent, hadn't taken much h2o to cause any structural damage.
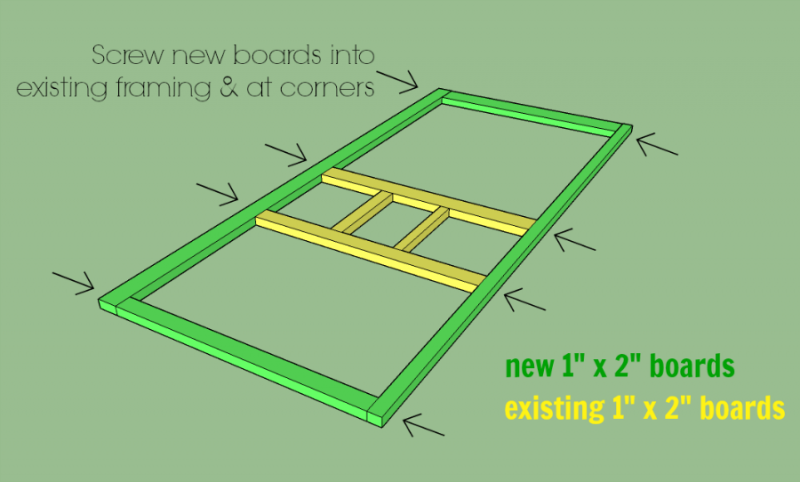
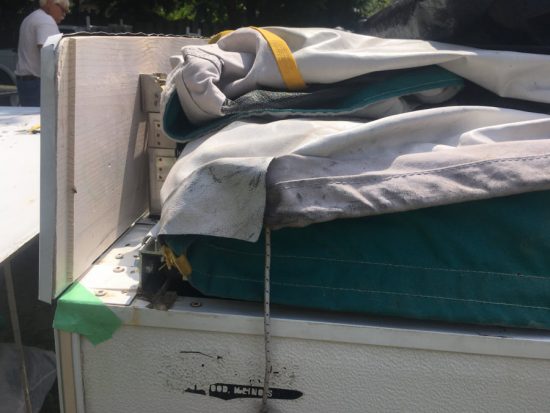
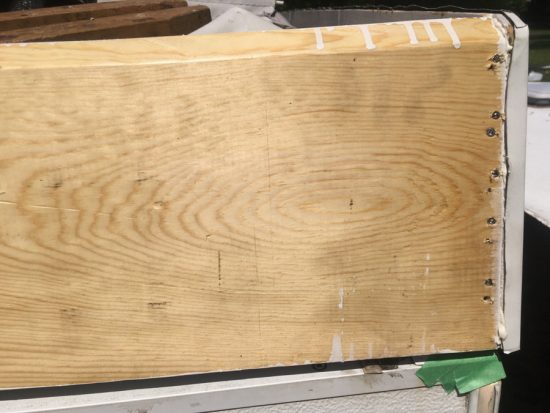
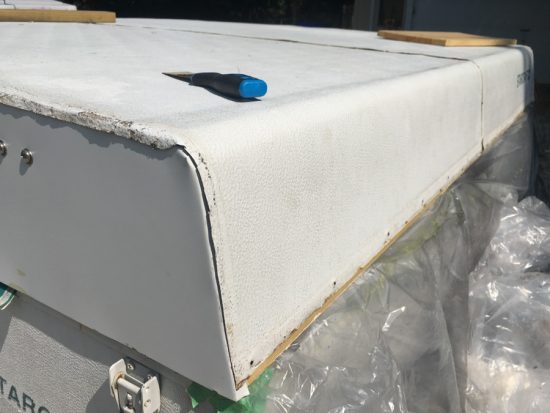
Besides the perimeter frame of the roof top, nosotros likewise had to completely rebuild all four sides of the camper roof. Equally you probably saw in the videos in part ane, these pieces of wood were completely rotting away. Nosotros used these one-time sides as templates to cut out our new sides.
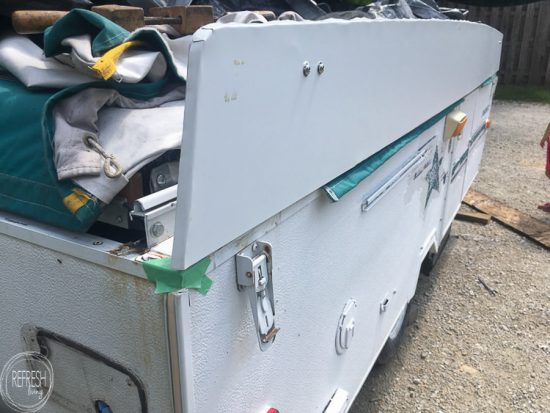
Our former pop upward roof sides were constructed of i/two″ plywood, which you could definitely use to make your new sides too. We decided to use 1″ boards (which are actually 3/four″ thick). Then, to recoup for the divergence in thickness, we just used a router to notch away 1/4″ from the ends where the boards would run across. (You lot could also simply cut the front end and back panels i/2″ shorter than the original panels to brand up for the slightly thicker sides.)
There are a couple of benefits to using 1″ boards instead of plywood. First, plywood is only sold in 8′ x iv′ panels at the home improvement shop, so in order to go a 10′ run, yous'd need to join those two boards together. Besides, nosotros planned to leave the wood exposed on the inside, and then a pino board would await much ameliorate than plywood.
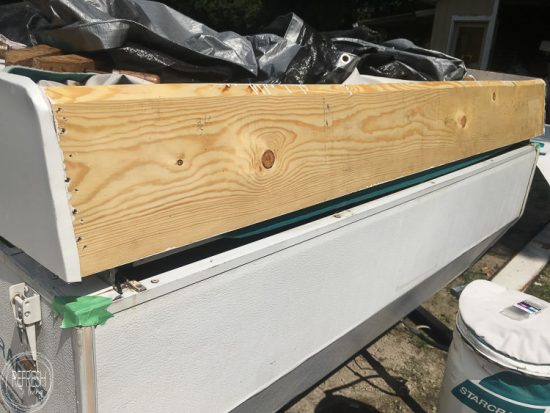
Rather than reuse the aluminum skin from the two sides of the roof boards (and spend hours trying to skin away rotted plywood pieces), we just purchased a roll of white aluminum flashing and used contact cement to attach information technology to the side pine boards.
We too used the one-time side boards as a template for where to drill our airplane pilot holes for the lifting mechanism screw bolts and fastened each one dorsum to the brackets.
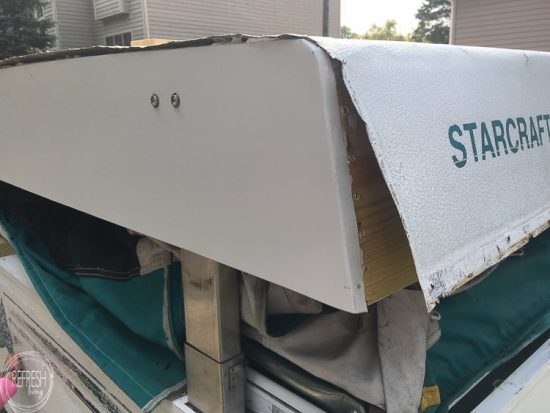
Reattach Roof Sides and Top to Camper
Adjacent, it was finally time to put the roof back on! We had rebuilt the frame on a pair of sawhorses next to the camper, then we flipped it dorsum over and laid it back in place. Considering nosotros had used our side boards as templates, everything was the same size and the roof height fit perfectly within the roof sides.
We used wood mucilage and small screws to attach the forepart and rear roof sides to the two side panels.
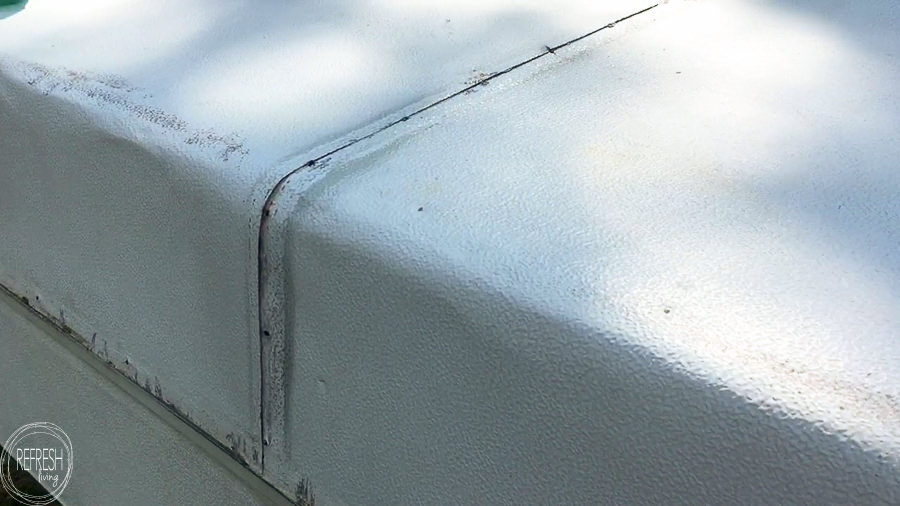
Because nosotros used 3/4″ thick pine board as opposed to the original ane/ii″ plywood, the peel didn't overhang and fold over quite as much as before. However, with the way I decided to keep everything watertight (which you lot'll meet in the next step), the slight departure in overhang didn't matter at all.
We used thin screws to attach the roof sides to the i x 2s in the roof superlative frame.
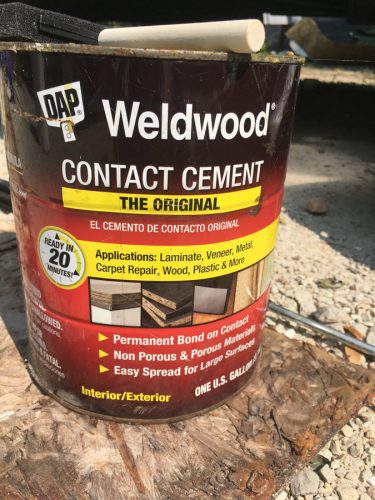
Finally, we again used contact cement to attach the roof skin to the front and back roof pieces.
Seal Up Holes and Seams to Prevent Time to come Leaks
Prefer to picket instead of read? Here's an overview of how we sealed the camper roof. Or, gyre downward to read below.
After everything was rebuilt and the pare was glued back down to the forepart and back sides, it was time to cease up the top and make sure it didn't accept any more than water in the future. Before I removed the skin, I made sure all of the old butyl tape and glue was completely removed. This step is very important because any new record or product won't stick to the old gunk. (Check out the details in this post on how to remove the old sealant and butyl tape on a camper roof.)
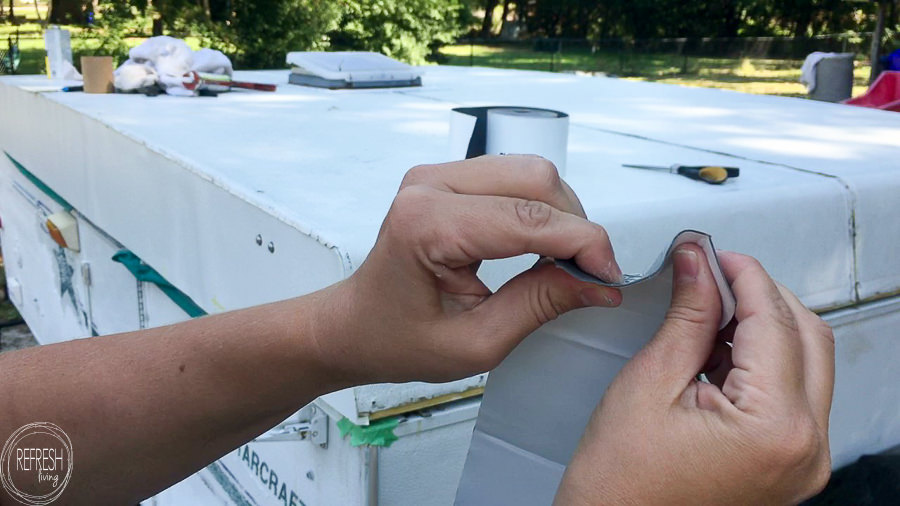
The production I decided to use to make sure none of those seams took any more h2o was Eternabond Tape. I read a ton of reviews, and went to my local RV store to talk to someone at that place well-nigh the efficacy of this record. Based on all of these opinions, it seemed that this stuff actually does work to seal upwardly any seams, holes, or tears in a camper roof, and then the merely matter left to do was to endeavour it out for myself. Basically, information technology's a rubberized tape that flexes with changes in temperature and weather condition. Information technology's uber sticky, and creates a waterproof seal.
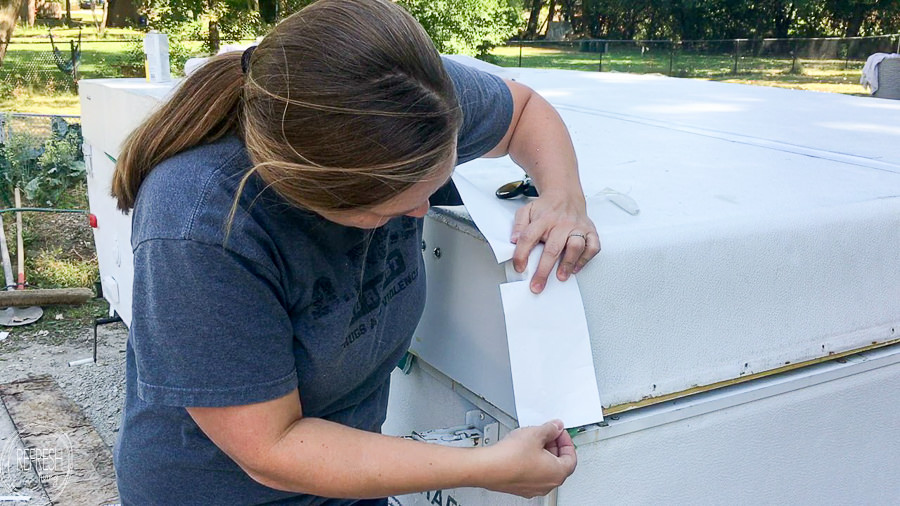
I started with the side seams of my camper and applied one long run of the record across each seam. By making small slits halfway through the tape, I was able to create a smooth laissez passer along the curved edges as well.
Basically, I applied this tape anywhere there were spiral heads, seams, holes, pin marks, or where trim would exist applied on meridian of it.
At that place are a few tricks to applying information technology, and you have to be conscientious nigh overlapping pieces, considering sometimes h2o can still sneak in. I am in the procedure of writing an entire post about applying Eternabond Tape, but I've described most of the details in the YouTube video at the acme of the mail service.
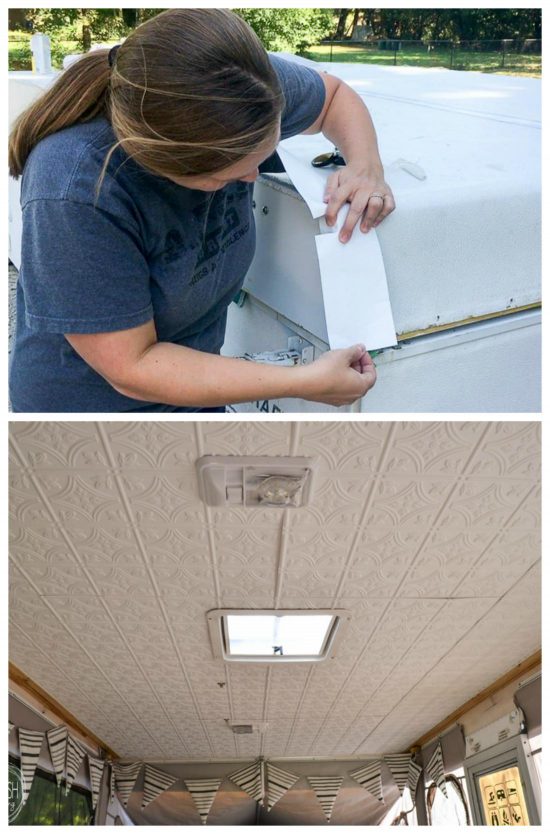
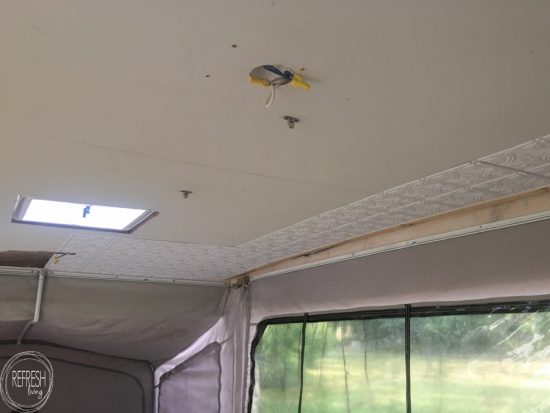
Reattach Canvas and Cosmetically Repair the Interior Ceiling
After the roof was fastened dorsum to the lifting brackets, we could attach the sheet back to the roof. Considering some of the old screws were rusted due to water impairment, I decided to use new, self-drilling screws to attach the sheet bracket to the wood frame.
Considering we decided to only replace the 1 x 2″ exterior frame of the roof and reuse the cream and interior paneling, I definitely needed to come upwardly with a solution to cover upwards the part of the roof that had peeled abroad because of the h2o damage. Here you'll find the complete tutorial on how we used glue up ceiling tiles to give the interior a completely new look.
I completed these repairs iii years ago, and it has held upwards beautifully. We haven't had any leaks or water entering the camper nevertheless! We keep it stored outside (and are located in northern Illinois where it rains, snows, and hails), merely to exist safe nosotros covered it with a piece of 4 mil plastic, and and so placed a tarp on superlative of that for the winter.
Like it? Pin It. (Thank yous!)
You can find all of my other pop up camper remodel projects here.

Join the Refresh Living DIY & Upcycling Community
Join the subscriber list to receive ane to two emails per month with updates from the weblog. PLUS, you'll gain access to my printables and graphics library. Every new design I create will be added here, and yous'll have complimentary access - forever!
Virtual high v! Yous're one step away; just check your e-mail to ostend your subscription.

Source: https://refreshliving.us/how-to-rebuild-and-repair-a-water-damaged-pop-up-camper-roof-part-2/
Posted by: craigtralk1957.blogspot.com
0 Response to "How To Repair Wood On Pop Up Camper"
Post a Comment